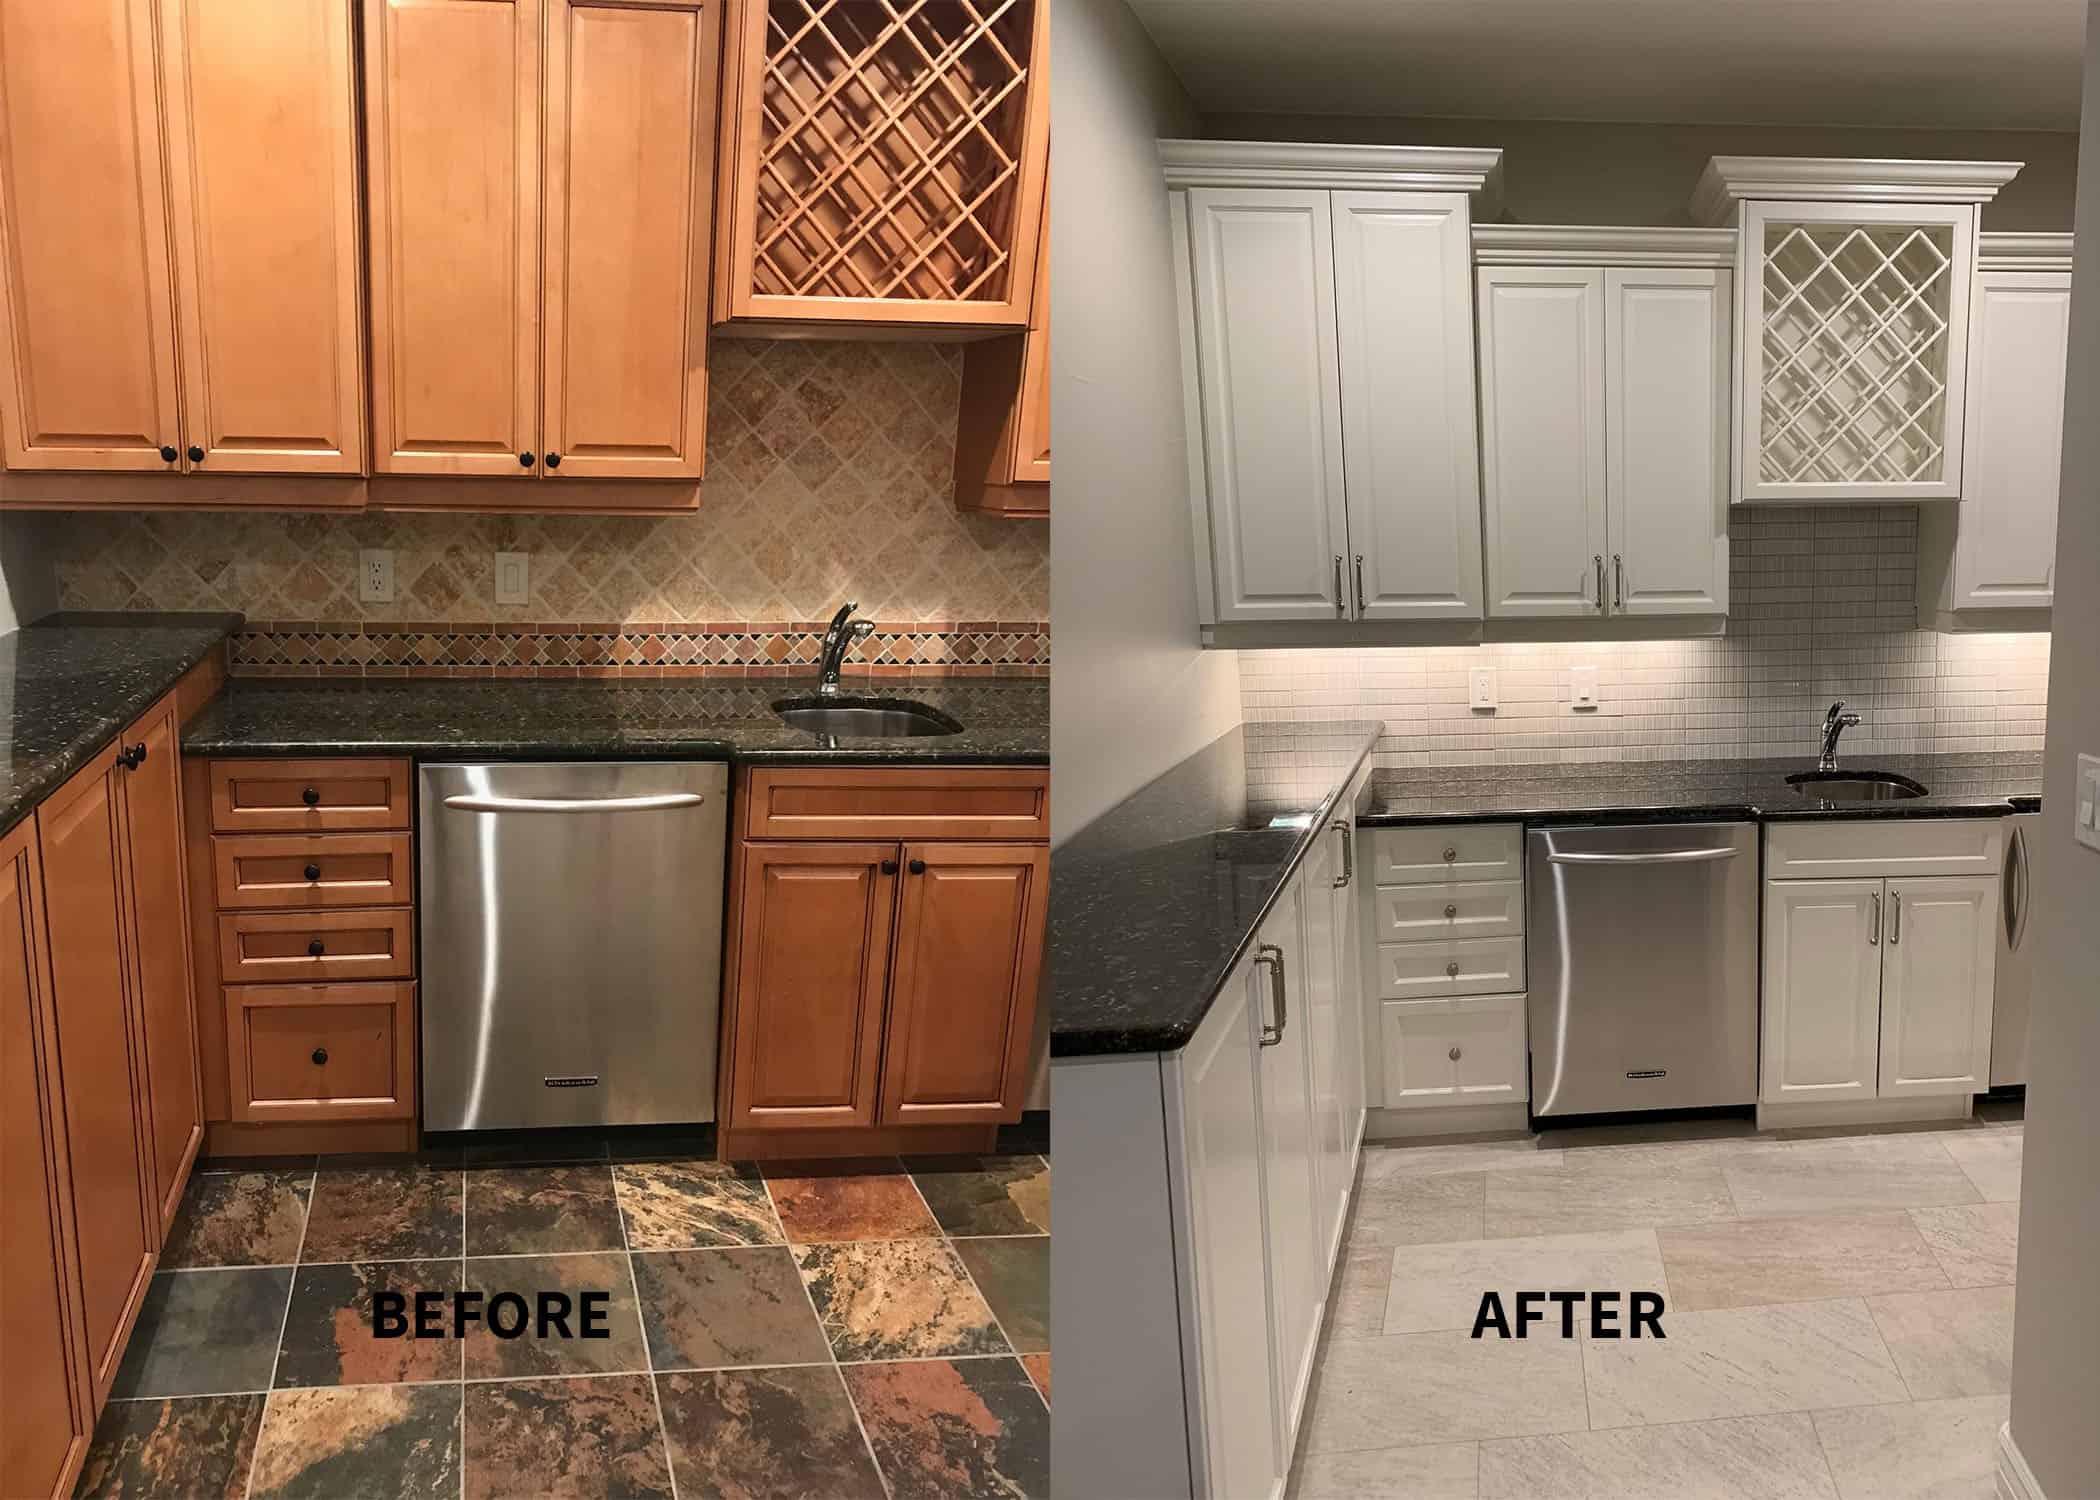
Preparing Oak Cabinets for Painting: Can I Paint My Oak Kitchen Cabinets

Painting oak kitchen cabinets can dramatically transform your kitchen’s aesthetic, but achieving a professional-looking finish requires meticulous preparation. Proper cleaning and sanding are crucial for ensuring the paint adheres correctly and lasts for years to come. Ignoring this vital step can lead to peeling, chipping, and an overall unsatisfactory result.
Cleaning Oak Cabinets
Thorough cleaning removes grease, grime, and any existing finishes that could interfere with paint adhesion. Begin by wiping down the cabinet surfaces with a solution of warm water and a mild dish soap. For stubborn grease, consider using a degreaser specifically designed for kitchen use. Always test any cleaning solution in an inconspicuous area first to ensure it doesn’t damage the wood. Rinse thoroughly with clean water and allow the cabinets to dry completely before proceeding to the next step.
Sanding Oak Cabinets
Sanding creates a smooth surface that promotes better paint adhesion. This process also helps to remove any remaining imperfections or old finishes. Start with a coarser grit sandpaper (around 120-grit) to remove any significant imperfections, then gradually move to finer grits (180-grit, then 220-grit) for a smoother finish. Always sand in the direction of the wood grain to avoid scratching. Use a sanding block to maintain even pressure and prevent uneven sanding. For detailed areas, consider using a sanding sponge for better control. Remember to wear a dust mask to protect your lungs from inhaling wood dust.
Sanding Methods and Effectiveness
The choice of sanding method significantly impacts the efficiency and quality of the surface preparation. Here’s a comparison:
| Method | Sandpaper Grit | Time Required | Effectiveness |
|---|---|---|---|
| Hand Sanding | 120-220 grit | Variable, depending on surface area and condition | Good for detailed areas and achieving a smooth finish; time-consuming for large surfaces. |
| Orbital Sander | 120-220 grit | Faster than hand sanding | Efficient for large, flat surfaces; may leave swirl marks if not used carefully. |
| Random Orbital Sander | 120-220 grit | Fastest method | Excellent for large surfaces; minimizes swirl marks compared to orbital sanders. |
| Palm Sander | 120-220 grit | Moderately fast; good control | Suitable for both large and detailed areas; offers a balance between speed and control. |
Filling Dents and Imperfections
Before painting, fill any dents or imperfections in the oak wood to create a smooth, even surface. Wood filler is readily available at most home improvement stores. Choose a filler that matches the color of your oak cabinets as closely as possible. Apply the filler using a putty knife, pressing it firmly into the dent or imperfection. Allow the filler to dry completely according to the manufacturer’s instructions. Once dry, sand the filled areas smooth using fine-grit sandpaper (220-grit or higher) to blend seamlessly with the surrounding wood. A final light sanding with 320-grit sandpaper will further refine the surface.
Choosing Paint and Supplies for Oak Cabinets

Selecting the right paint and supplies is crucial for achieving a professional-looking finish on your oak kitchen cabinets. The wrong choices can lead to uneven coverage, chipping, or a less durable result. Careful consideration of paint type and the tools you’ll use will significantly impact the final outcome and the ease of the painting process.
Paint Types for Kitchen Cabinets
The choice of paint depends on several factors, including the desired finish, durability requirements, and your personal preferences. Kitchen cabinets endure significant wear and tear, so choosing a durable paint is essential.
- Latex Paint: Latex paints are water-based, making them easy to clean up with soap and water. They offer good durability, are relatively low in odor, and dry quickly. However, they might not be as durable as oil-based paints in high-traffic areas and may require multiple coats for optimal coverage on oak’s porous surface.
- Oil-Based Paint: Oil-based paints provide superior durability and a harder, more resistant finish than latex paints. They are more resistant to scratches and moisture, making them ideal for kitchen cabinets. However, they have a strong odor, take longer to dry, and require solvents like mineral spirits for cleanup. This option is less popular due to environmental concerns and the stronger odor.
- Alkyd Enamel Paint: Alkyd enamels offer a good compromise between latex and oil-based paints. They dry faster than oil-based paints, have a lower odor than oil-based paints, and offer good durability and a smooth finish. Cleanup requires mineral spirits.
Necessary Painting Supplies
Having the right tools on hand streamlines the painting process and contributes to a superior finish. Investing in quality supplies is worthwhile to avoid frustrating issues during the project.
- Brushes: Use high-quality angled sash brushes for detailed work like edges and corners, and a larger brush for broader surfaces. Natural bristle brushes are good for oil-based paints, while synthetic brushes work well with latex and alkyd paints.
- Rollers: A high-nap roller (1/2″ to 3/4″ nap) is recommended for achieving a smooth finish on cabinets. Choose a roller cover suitable for the type of paint being used.
- Sprayers (Optional): An HVLP (High Volume, Low Pressure) sprayer provides an even coat and is ideal for large surfaces, though it requires more preparation and cleanup. It’s essential to practice spraying techniques on scrap wood before applying to the cabinets.
- Drop Cloths: Protect your floors and surrounding areas from paint splatters with ample drop cloths. Canvas drop cloths are more durable than plastic ones.
- Painter’s Tape: Use high-quality painter’s tape to mask off areas you don’t want to paint, ensuring clean lines. Apply the tape carefully to prevent bleeding.
- Sandpaper: Various grits of sandpaper (e.g., 120, 180, 220) are needed for sanding between coats to achieve a smooth finish.
- Putty Knife: A putty knife is helpful for filling any imperfections in the wood before painting.
- Tack Cloth: Use a tack cloth to remove dust and debris from the cabinets before painting.
- Paint Trays and Liners: These are essential for easy paint application and cleanup.
- Safety Gear: Wear gloves, eye protection, and a respirator, especially when working with oil-based or alkyd paints.
Painting Supplies Checklist, Can i paint my oak kitchen cabinets
A comprehensive checklist ensures you have everything needed before starting. This prevents interruptions and delays during the project.
- Paint (sufficient quantity for multiple coats)
- Primer (if needed)
- Brushes (various sizes)
- Rollers and roller covers
- Sprayer (optional)
- Drop cloths
- Painter’s tape
- Sandpaper (various grits)
- Putty knife
- Tack cloth
- Paint trays and liners
- Gloves
- Eye protection
- Respirator
- Cleaning supplies (soap and water or mineral spirits)
- Stir sticks
Organized Workspace for Painting Cabinets
A well-organized workspace improves efficiency and reduces the risk of mistakes.
Imagine a large, well-lit area, preferably a garage or a spare room. One side of the space features a designated area for paint and supplies, organized on a sturdy table or workbench. Paint cans are clearly labeled, brushes and rollers are neatly arranged in containers, and drop cloths are readily accessible. The other side is dedicated to the cabinet painting process itself, with adequate space for turning and maneuvering the cabinet doors and drawers. The floor is completely covered with drop cloths. Good ventilation is ensured, especially when using oil-based or alkyd paints. A small waste container is placed nearby for easy disposal of used materials. The overall setup is clean and free of clutter, allowing for smooth and efficient workflow.
Painting Techniques and Procedures for Oak Cabinets

Painting oak kitchen cabinets requires careful consideration of technique and procedure to achieve a professional, durable finish. The choice of painting method significantly impacts the final result, influencing both the speed of the project and the quality of the paint application. Proper preparation is paramount, laying the foundation for a flawless finish.
Comparison of Painting Techniques
Selecting the right painting technique is crucial for a successful cabinet makeover. Each method offers unique advantages and disadvantages, making certain techniques more suitable than others depending on the project’s scale and the painter’s skill level.
| Technique | Advantages | Disadvantages | Best Use Case |
|---|---|---|---|
| Brushing | Precise control, good for detailed work, relatively inexpensive equipment. | Labor-intensive, can leave brush strokes if not applied carefully, slower than spraying. | Small projects, detailed trim work, achieving a textured finish. |
| Rolling | Faster than brushing for large surfaces, relatively inexpensive equipment. | Can leave roller marks if not properly blended, less control than brushing, unsuitable for intricate details. | Large, flat cabinet surfaces, achieving a smooth, even finish with careful technique. |
| Spraying | Fastest method, produces a very smooth finish, ideal for even coverage. | Requires specialized equipment, can be messy if not used properly, requires good ventilation, potentially more expensive. | Large projects, achieving a perfectly smooth, factory-like finish. Requires appropriate safety precautions. |
Step-by-Step Guide to Painting Oak Kitchen Cabinets
The following steps provide a comprehensive guide for painting oak kitchen cabinets, ensuring a high-quality, long-lasting result. Remember, thorough preparation is key to success.
- Thorough Cleaning: Begin by thoroughly cleaning the cabinets with a degreaser to remove any grease, grime, or old finishes. Allow to dry completely.
- Surface Preparation: Sand the cabinets with fine-grit sandpaper (180-220 grit) to create a slightly rough surface for better paint adhesion. Wipe down with a tack cloth to remove dust.
- Priming: Apply a high-quality primer designed for adhesion to wood and previously painted surfaces. Use a brush, roller, or sprayer depending on your chosen technique. Allow to dry completely according to manufacturer’s instructions. Multiple thin coats are better than one thick coat.
- Base Coats: Apply two coats of your chosen paint color, allowing each coat to dry completely before applying the next. Use smooth, even strokes, avoiding drips and runs. Light sanding between coats with very fine grit sandpaper can help achieve a smoother finish.
- Top Coats: Apply two coats of a high-quality topcoat, such as a polyurethane varnish, to protect the paint and enhance durability. Allow each coat to dry completely.
Tips for Achieving a Smooth, Even Finish
Preventing brush strokes and drips is crucial for a professional-looking finish. Thin coats, proper technique, and quality tools are key.
Always apply paint in thin, even coats. Multiple thin coats will provide a smoother finish than one thick coat.
Maintain a wet edge when painting to prevent lap marks. This means overlapping each stroke slightly while the paint is still wet.
Use a high-quality brush or roller with appropriate nap length for your paint type. A good quality brush will significantly reduce brush strokes.
Use painter’s tape to protect areas you don’t want to be painted, ensuring crisp lines.
Allow ample drying time between coats. Rushing the process can lead to imperfections.
